Adding a Simple Cookie Consent Banner in Microsoft Power Pages
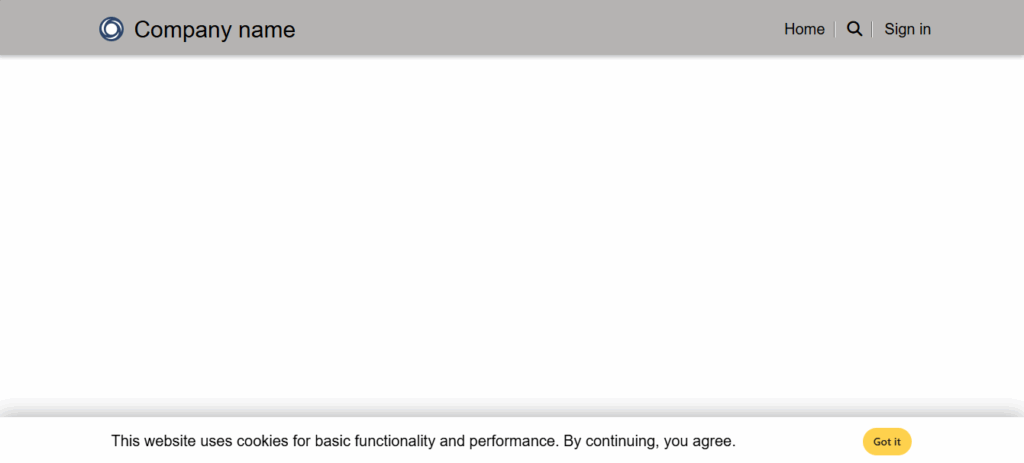
By default, Microsoft Power Pages uses cookies for essential functionality, but it does not include a built-in cookie consent popup. If you want to notify visitors in a simple and user-friendly way, you can easily add your own banner with just a few lines of code.
In this post, I’ll show you how to create a lightweight cookie consent banner with a “Got it” button. No preferences or complex configuration needed — just a clean notice that disappears once the user accepts.
Why You Need This
- Transparency: Inform users about cookie usage.
- Compliance: Many regions require at least a basic notice.
- User Experience: A non-intrusive banner that goes away after acceptance.
Step 1 – Create Content Snippets
First, we’ll store the banner text in content snippets so editors can update wording later without touching code — even in multilingual setups:
- In Power Pages Studio, open the … (More) menu and select Power Pages Management app.
- In the Power Pages Management app, navigate to Content → Content Snippets.
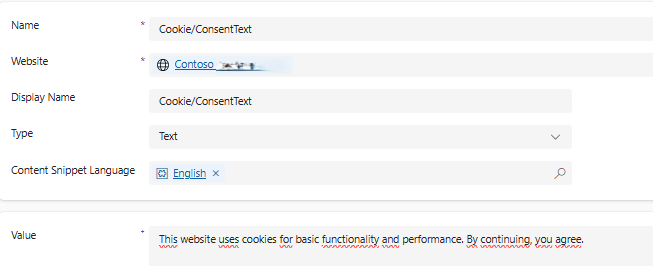
- Click New to Create a new content snippet:
- Name:
Cookie/ConsentText - Website:
<Your Site> - Display Name:
Cookie/ConsentText - Type:
Text - Content Snippet Language: Select your default language
- Value:
This website uses cookies for basic functionality and performance. By continuing, you agree.
- Name:
- Repeat step 3 to create extra snippets for different laguages, keep the name the same:
Cookie/ConsentText
💡(Optional but recommended) Create a second content snippet for the button label:
- Name:
Cookie/ConsentButton - Value: Got it
Step 2 – Create the “Cookie Consent” Web Template
Next, we’ll add the banner markup, styling, and script to a dedicated Web Template.
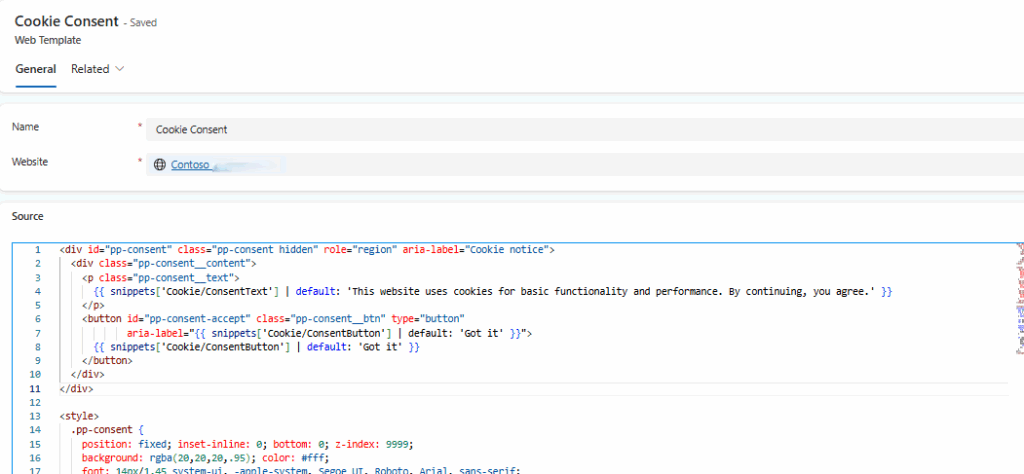
- In the Power Pages Management app, go to Web Templates → New.
- Set the Name to
Cookie Consent. - Set the language to your default language
- Paste in this code in Source
<div id="pp-consent" class="pp-consent hidden" role="region" aria-label="Cookie notice">
  <div class="pp-consent__content">
    <p class="pp-consent__text">
      {{ snippets['Cookie/ConsentText'] | default: 'This website uses cookies for basic functionality and performance. By continuing, you agree.' }}
    </p>
    <button id="pp-consent-accept" class="pp-consent__btn" type="button"
            aria-label="{{ snippets['Cookie/ConsentButton'] | default: 'Got it' }}">
      {{ snippets['Cookie/ConsentButton'] | default: 'Got it' }}
    </button>
  </div>
</div>

<style>
  .pp-consent {
    position: fixed; inset-inline: 0; bottom: 0; z-index: 9999;
    background: rgba(20,20,20,.95); color: #fff;
    font: 14px/1.45 system-ui, -apple-system, Segoe UI, Roboto, Arial, sans-serif;
    box-shadow: 0 -6px 24px rgba(0,0,0,.25);
  }
  .pp-consent.hidden { display: none; }
  .pp-consent__content {
    max-width: 1080px; margin: 0 auto; padding: 14px 16px;
    display: flex; gap: 12px; align-items: center; justify-content: space-between; flex-wrap: wrap;
  }
  .pp-consent__text { margin: 0; }
  .pp-consent__btn {
    border: 0; padding: 8px 14px; border-radius: 9999px; cursor: pointer;
    background: #ffd24d; color: #1b1b1b; font-weight: 600;
  }
  .pp-consent__btn:focus { outline: 2px solid #fff; outline-offset: 2px; }
</style>

<script>
(function() {
  var KEY = "pp_cookie_consent_v1";
  try {
    if (localStorage.getItem(KEY) === "accepted") return;
  } catch(e) {}

  var banner = document.getElementById("pp-consent");
  var btn = document.getElementById("pp-consent-accept");

  function hide() { banner.classList.add("hidden"); }
  function accept() {
    try { localStorage.setItem(KEY, "accepted"); } catch(e) {}
    hide();
  }

  if (banner && btn) {
    banner.classList.remove("hidden");
    btn.addEventListener("click", accept);
    banner.addEventListener("keydown", function(ev){
      if (ev.key === "Escape") hide();
    });
  }
})();
</script>
💡 Optional: If you only want to show the banner to anonymous visitors, wrap the entire block in{% if user == null %} ... {% endif %}.
Step 3 – Include It in the Footer Web Template
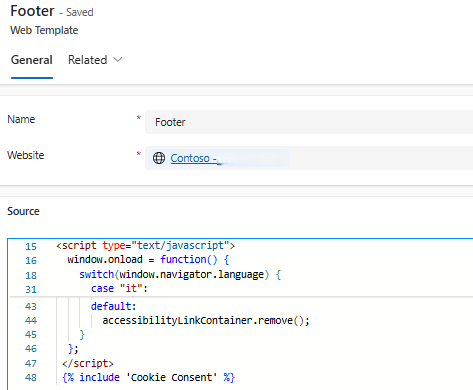
Finally, we include the cookie consent template in the site footer.
- In the Power Pages Management app, open Web Templates → Footer.
- At the very end, add:
{% include 'Cookie Consent' %} - Save your changes.
Step 4 – Publish and Test
- Save and publish your portal.
- Open your site in an incognito/private browser window.
- The banner should appear at the bottom of the page.
- Click Got it, refresh the page — the banner won’t come back because it’s stored in
localStorage.

Step 5 – Customize the Look
You can easily customize the styling:
- Adjust colors in the CSS block to match your theme.
- Replace the button with Bootstrap classes if you prefer:
<button id="pp-consent-accept" class="btn btn-primary"> {{ snippets['Cookie/ConsentButton'] }} </button> - Update the wording any time in the Content Snippets — no code changes needed.
Conclusion
With just one content snippets, a dedicated Web Template, and one line in your Footer, you now have a simple cookie consent banner in Microsoft Power Pages.
It’s:
- Lightweight
- Language-aware via snippets
- Easy to edit by content authors
- Reusable thanks to the Web Template include


